Tree drawings inspired by the greenery on the CCAC West Hills campus. View our entire digital forest!
techred home > computer fundamentals module: trees

File Trees & Operating Systems

Many computer components, algorithms, and design choices have been inspired by natural systems. File oragnizations and index listings--to name only a few--are structured in tree form.

In their simplest form, a tree-like data structure contains a single root node with children, who themselves can have children. Tree nodes are connected hierarchically (with a top and a bottom) and contain NO cycles. No children are linked to their parents as their own kids! Yikes!

Contents

check_boxLearning Objectives
bookModule resources
bookKey points
wb_incandescentPhase 1: Draw your favorite biological tree
wb_incandescentPhase 2: Build a digital tree
wb_incandescentPhase 3: Visualizing your digital tree
wb_incandescentPhase 4: Dissecting files (leaves)
wb_incandescentPhase 5: Grow and graft one another's tree
wb_incandescentPhase 6: Hashing!
wb_incandescentPhase 7: Creating a file tree banner

check_boxLearning Objectives

  1. Create directories and files in MS Windows in a tree-like structure to store information related to a subject of interest
  2. Navigate a directory structure using a file path and create file paths to describe a location in a given tree
  3. Use OS tools to compress, decompress, and analyze file and directory sets
  4. Navigate the MS Windows command prompt to traverse a file tree and use the tree utility to visualize the directory structure of a given rooted tree

arrow_upward back up to contents


check_boxModule resources

File Explorers: Software that allows the user to navigate into various directories in a file tree, manipulate those directories, open files and run programs inside of them

File systems: While all modern computers use tree-like structures to organize the files they're responsible for, the actual details of how the files are arranged is called a File System. This reference article describes all major file systems in use today.

other resources:

arrow_upward back up to contents


motorcycleKey points

The following list details the essential concepts of tree-based file systems

arrow_upwardback to top


motorcyclePhase 1: Draw your favorite biological tree

Venture outside and find a tree that's interesting to you, and create a drawing of it on a 1/2 sheet of normal letter paper. It's that simple!

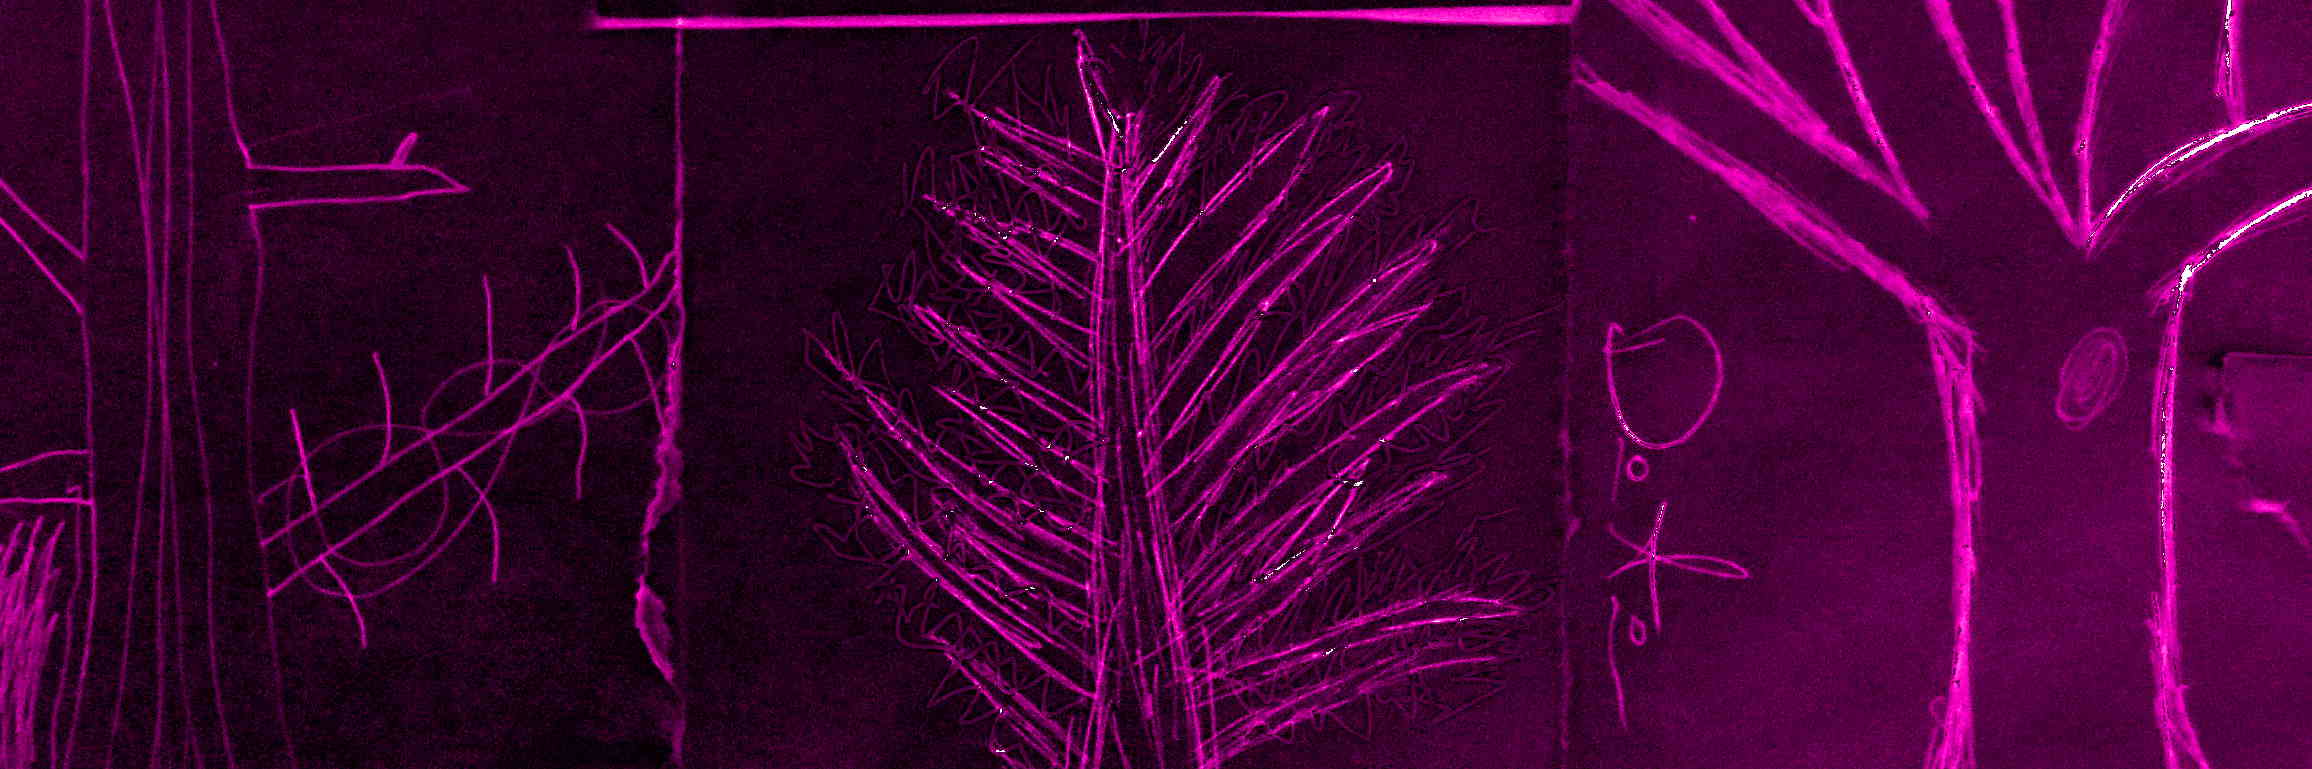
Browse our digital forest of other students' trees

Tips

  1. No need to be an "artist" -- we can all draw lines on a paper!
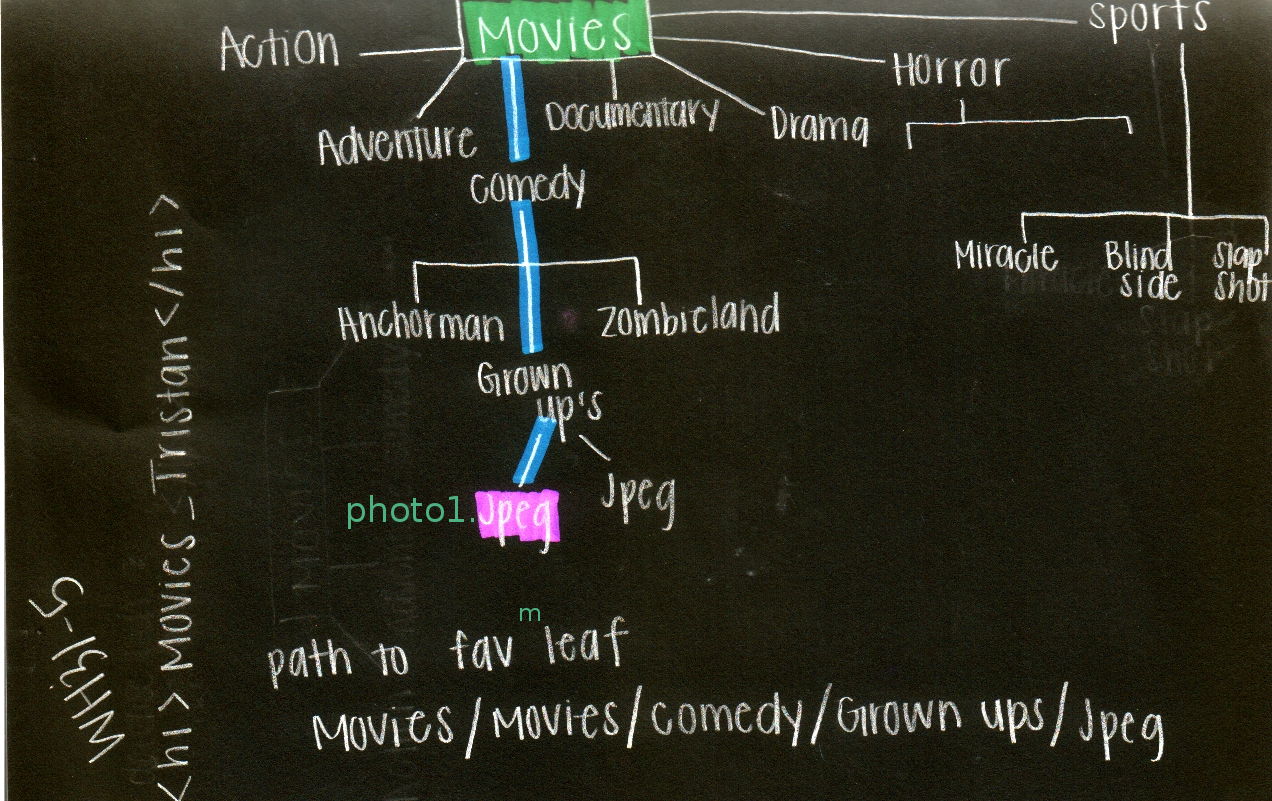
  2. File trees all start wtih a single directory--the "root" of the file tree. When you draw a real tree, choose a tree with a single trunk that branches into many. Draw from the bottom-up.
  3. Focus on the branching first, and add leaves last.

arrow_upwardback to top


motorcyclePhase 2: Build a digital tree

Files in your system are stored in tree structures. This activity will ask you to generate a mini file system and store some interesting file-based content as "leaves" in that tree.

View the guide video embedded below: Week 2, Segment 4 for a walk through of this activity. The following steps will be also note how to document your tree-creation process.

  1. Choose a topic of interest to you: one that can be divided into categories and subcategories and that you can find related media on the Web to pull and sort into your tree. A good place to start is to download one of the existing trees created by students attending in-person sections.
  2. Once you download the file from the shared folder, right click that directory which is zipped/compressed and right click: select "extract all" and then follow the prompts to unzip the files. Now you can navigate those files normally. You can view the step-by-step from Microsoft support here.
  3. On a regular old sheet of paper, create your directory structure of your tree that shows the nested folders. The root of your tree should be the general category of your interest: such as "cars" or "desserts" or "video games." Here is a sample hand-written tree plan:
  4. movies tree
  5. With your plan in front of you, navigate to your Documents directory in Windows Explorer. Start building your tree in the computer by creating your root directory (i.e. "folder"). For the example tree above, the root directory would be called "Movies." You can create a new folder by 1) Holding down control + shift and tapping the "n" key or 2) Right-clicking your mouse in the open white space underneath any files inside a directory >> New >> Folder.
  6. Then navigate into that root folder and create the subdirectories inside that one, so in this example, the student's subdirectories would include "Action", "Adventure", "Comedy" and so forth.
  7. Once you have all of your directories created, you can start filling those directories with the "leaves" or the actual files that show examples of the content you're interested in. You can find this content via an image search on the internet. When you have found an image or movie of interest, right click that image >> save image as >> then navigate your file tree and find the appropriate directory and save the image there.
  8. You can create links to Internet content by navigating to a directory in your tree, right clicking in the open white space >> New >> Shortcut and follow the prompts to paste in the URL/link and choosing a name for the file.
  9. In your documentation for this week, paste in an image of your hand-written file tree. You can take this with a camera or use a scanner. Or, you can create your file tree in a program on the computer and export that image. Draw.io is a free google-docs based program that is great for making diagrams (the operating system diagram above was created in Draw.io).
  10. Also, choose a leaf (i.e. a file) you find most interesting, and write the path to that file, which is a listing of all the directories from the root to that leaf's directory and the actual file name and extension itself. In the example above, the student is most interested in the files in the Grown-Ups directory so the path to the file photo1.jpeg would be: "Movies\comedy\grownUps\photo1.jpeg"
  11. In a sentence or two, summarize why file trees are a clever way to organize information in a computer. The guide video is an excellent resource for learning about the advantages of a file tree as opposed to a simple list of files.

arrow_upwardback to top


motorcyclePhase 4: Dissecting files (leaves)

Exercise type: Guided Exploration

A file is a named chunk of information in a computer that is created, stored, retrieved, and updated as a bundle. The operating system is responsible for tracking where each and every file in the system is located, coordinating access to those files, and allowing the user and programs to manipulate those files. This sequence will guide you though exploring various file types in your system and how to access and edit them.

Watch the companion video to this exercise

The video: Week 2, Segment 3 posted on YouTube will guide you though an exploration of the file tools available in operating systems. When done, then work through the following documentation steps.

Note that the video will ask you to open your file explorer and enable viewing of the file extensions, which is a check box located in the "View" ribbon inside your file explorer, as pictured below:

file properties

You'll be guided through locating the file properties dialog box and exploring the various features of the operating system's file management tool set. This screen shot is of the properties dialog box for an image generated by the Windows screen Snipping application:

file properties

Document Your Learning for this phase:

  1. Locate an image file on your computer, probably somewhere in your Documents directory. View the properties for this file and record in your word processing document this information about the file:
    • The file's location as a complete path from C:\
    • The type of file, as indicated by the extension
    • The file's size in KB and in Bits (number of 1s and 0s) using this conversion tool.
    • The dimensions of the image in Pixels (as found in the "Details" tab of the properties dialog box for that particular file.
    • The date this file was created and last modified
  2. Navigate to one of the many operating system file directories, such as C:\Windows\System32\ containing files that you have probably never heard of or used before. Record the same information as you did for the image file for two other files in this system directory. (They aren't images so they won't have a pixel size). Try choosing a file with a .dll extension and one with the .exe extension (an executable file--i.e. an application).
  3. Ponder for a moment and then generate an answer to the following question: Why does exploring the properties of a single file help us understand how an operating system works? (Doesn't need to be long, just thoughtful).

arrow_upwardup to contents


motorcyclePhase 5: Grow and graft one another's trees

Learn the basics

Read the first two paragraphs about tree grafting on wikipedia . We will perform a digital version of grafting on our trees. Look at some of the photos and read their captions.

Prepare for visitors to your station:

  1. Place your tree diagram next to your keyboard.
  2. Open two file browser windows, and point each to the directory with your name in the title, so that the only visible directory on each of the two file browsers is the root of the interest tree.
  3. Clear out the rest of your gear to create a nice workspace. Log out of any personal accounts in any browser on the computer.

Rotation 1: Create a log and list files (leaves)

  1. You should be sitting at another person's computer and can see their tree in Windows File Explorer. Navigate to the root of the tree (the only directory visible should be the name of the topic of the tree)
  2. Create a new file next to the root directory called visitorLog.txt. You can do this by opening up the program called Notepad and then saving the file to the proper location in the tree.
  3. Add your name to the visitor log and note the time, date, and any actions performed on the tree in your entry.
  4. Create a blank spreadsheet in either MS Excel or LibreOffice Sheets. Create a column header called "file name" and a second column header called "Size (KB)"
  5. Traverse this new tree and create a list of all the leaves, their filenames with extensions, and their size in KB.
  6. Use the spreadsheet to add up the size of all of these leaves by creating a sum formula in the cell directly after the last entry of a file.
  7. Now navigate to the root of the tree, right click the directory, and record the size information displayed.
  8. Compare the computer's displayed tree size with the computer properties dialog box's size display. What is the difference in sizes? Why might this be?

Rotation 2: Growing the tree

  1. Be creative and add at least 2 new branches and 2 new leaves somewhere on the existing tree. Make a note in the visitor log of the path to each of your new components of the tree. See example below:
  2. Create a new entry in visitorlog.txt with your name, the date, and a sentence or two about what changes you made to the tree.

Rotation 3: Grafting in another entire tree to the WRONG location

  1. Download an existing file tree from our digital forest on line. It will come down compressed. Decompress this file tree. Copy the entire tree into the clipboard on the computer. Paste this tree somewhere onto the user's tree that's not the root. Do not update the tree diagram in front of you.
  2. Create a new entry in visitorlog.txt with your name, the date, and a sentence or two about what changes you made to the tree.

Rotation 4: Fixing a bad graft

  1. Locate the misplaced sub-tree in your user's tree. Create a new directory on the same level with your user's tree of interest that's called grafted_tree. Navigate into this directory. CUT (with control + x) and paste this new mini-tree to be at the same level as the root directory of the user's existing file tree. Now we have the second tree existing in parallel to the original tree.
  2. Create a new entry in visitorlog.txt with your name, the date, and a sentence or two about what changes you made to the tree.

Rotation 5: Move back to your own tree: visualize your new tree

  1. Now that you are back at your own tree, use the tree utility in the Windows Command Prompt to re-visualize your tree with the additions made by your classmates. Copy and paste the output of this program into a column next to your initial visualization, and highlight the changes between the trees. See, digital trees can grow, too!

This tree about trucks started small (left) and then expanded to include two more branches (directories called Toyota and Dodge) and lots more leaves (files called Calorado and Ram...)

visualized tree structure before and after growth of tree by peers

arrow_upwardtop


motorcyclePhase 6: Hashing!

Background info

We often want to be able to know if a file has been changed, say, during a transfer between computers, or over a network, or by an existing program on a computer. Comparing the inner guts of all one file's parts with its copy would take a very long time and is very error prone.

A nifty set of tools called hash functions has been devised which boil an entire file of any length down to a number that's a couple dozen digits long. This hashed value can only come from a file that contains exactly that configuration of bits. If we hash two files, we only have to compare the hash values of each to determine if they are different or not.

Steps

  • Navigate to the root of your tree (the topic root). Right click the root and select Send to >> compressed (zip) folder
  • When the system is done zipping the file, you are automatically given a chance to rename the file. Call this zipped version "zipped_tree_base_version". Windows should automatically add the .zip extension to the end.
  • Right click this zipped tree (which is now just a single file) and select SHA or something close. Then select SHA-2 which should open a window with a long number in it. This is the hashed value of the entire zipped file. Copy this value into your tree log and label it the base version's hash.
  • Rotate to another tree at your instructor's assignment. Your instructor must now also tell you somehow if you have been assigned to change your peer's tree or not. If you are assigned to change the tree, change a single file name by ONLY ONE LETTER! This is very sneaky.
  • Return to your own tree. We don't know if anything about it has been changed or not, but we can use hashing to check! Zip your entire tree again. Retrieve the SHA-2 hash value. Copy it directly below the original hash value. Compare the numbers digit-for-digit. If they are different, then the file has changed. If they are the same, absolutely nothing has changed about the tree!
  • Check back with the person who tinkered and if they changed something, ask to see it.
  • Brainstorm with your partner when this tool might be useful: in security? in file transfer? In backing up stuff?

arrow_upwardtop


motorcyclePhase 7: Create a poster of your tree

Sample poster

sample tree poster

Steps

  1. Grab a stack of note cards. Each directory needs its name printed clearly on a white note card
  2. Navigate back to your tree's file list in a spreadsheet. We want to add the type of the file as another column in the sheet. A fourth column should be the default program for opening the file. Traverse your tree and make sure the listing is entirely correct, including the leaf locations
  3. Based on the file type, choose a color scheme for writing your files onto colored note cards. Perhaps make image files blue, and link files yellow.
  4. List the file's path, size, type, and default program on each of the leave's note cards
  5. Position the directory and file cards on your poster paper in a neat and interesting way. Connect them with lines that show the tree structure. We can have the root of the tree on the top or bottom of the paper.
  6. Prepare your poster for hanging by attaching the wood rod at the top, the weights on the lower corners, and the wire hanger.
  7. Print out the digitally drawn version of your tree that the command prompt program called tree generated. This is so viewers can learn about trees by looking over your poster.

arrow_upwardtop


Page created in 2018 and can be freely reproduced according to the site's content use agreement.